You've got the baking down. Now it's time to get your business online.
Whether you're tired of managing orders through DMs, want a more professional way to take payments, or you're just getting started selling your baked goods, Bakerkit gets you up and running fast. No website. No tech skills. No stress.
Here's exactly how to set up your Bakerkit storefront from scratch, in under an hour.
Step 1: Create Your Bakerkit Account
Head over to Bakerkit and sign up for your free trial. No credit card required.
You'll be taken straight to the onboarding form, which is quick to fill out.
Step 2: Complete Onboarding
Bakerkit's onboarding is a single page with four fields. Fill these out and you're in.
- Full name. Your name as the baker.
- Contact email. This is the reply-to address on order confirmation emails so customers can reach you.
- Country. This sets your storefront currency and determines how Stripe payments are processed if you connect it later.
- Storefront URL. This is the link you'll share with customers. It takes the format
yourbakeryname.bakerkit.app, so something likesweetsbysarah.bakerkit.apporthesugarstudio.bakerkit.appworks great. Keep it short, use your bakery name, and don't overthink it. You can change it later.
Hit continue and you'll land on your dashboard, with three sample products already seeded so your storefront looks live right away.
Step 3: Add Your Products
The sample products are just placeholders. Head to the Products section and start adding your real menu items.
For each product, you'll want to fill in:
- A clear product name. Be specific. "Vanilla Bean Birthday Cake" beats "Cake."
- A description. Mention flavors, serving counts, and any customization details customers need to know upfront.
- A price. Each product has a single price. If you offer different sizes, add them as separate products.
- A category. Helps keep your menu organized as it grows.
- A lead time. How many days in advance does a customer need to order this item? This protects you from last-minute requests.
- A photo. Products with photos get more clicks. Natural light and a clean background go a long way.
Take your time here. Your product listings are your storefront shelves. The more detail you include, the fewer back-and-forth messages you'll get from customers asking questions.
Step 4: Customize Your Storefront
Before you start taking orders, make it yours. Head to the Storefront section of your dashboard.
- Upload your logo. This is the first thing customers see. It doesn't need to be fancy, a clean image of your bakery name or a simple icon goes a long way toward looking professional.
- Add an announcement banner. Got a holiday menu dropping soon? Taking a break in December? The announcement banner is a great way to keep customers in the loop.
- Use the Storefront Builder. For deeper customization, the builder lets you adjust your layout, colors, typography, and section order with a live preview alongside your changes.
A polished storefront builds trust and converts visitors into paying customers.
Step 5: Configure Your Payment Options
Bakerkit gives you two ways to get paid, and you can use both at the same time.
Online payments via Stripe
Connect your Stripe account to accept credit and debit card payments at checkout. Bakerkit never charges transaction fees. Stripe's standard processing rates apply, but every dollar lands directly in your account.
If you don't have a Stripe account yet, you can create one for free during setup. It takes about 10 minutes.
Manual payments
Prefer cash, Venmo, Zelle, CashApp, or PayPal for local pickups? Add your manual payment methods under Settings and include instructions for customers at checkout. This is completely free with no added fees.
Most bakers use both. Online payments for orders placed in advance, and manual payments for local pickup regulars.
Step 6: Set Your Availability
Before you go live, head to Settings and configure your availability so customers can only order when you're actually able to bake.
- Lead time. Set a default minimum number of days in advance customers must order. You can also set this per product if some items need more notice than others.
- Blocked dates. Mark days you won't be taking orders, like holidays, vacations, or personal days. Customers won't be able to order for those dates.
- Max orders per day. Optionally cap how many orders you'll accept on any given day so you don't overcommit.
Getting these settings right upfront saves a lot of headaches later.
Step 7: Share Your Storefront
Your storefront is live. Now get it in front of people.
Here are the best places to share your Bakerkit link:
- Instagram and Facebook bio. The single highest-impact thing you can do. Anyone who visits your profile can click straight to your storefront.
- Facebook community groups. Local buy/sell groups, neighborhood pages, and cottage food communities are full of potential customers.
- Google Business Profile. If you have one, add your storefront URL as your website. This helps you show up in local searches for baked goods.
- Word of mouth. Text your link to existing customers and ask them to share it. Personal recommendations convert better than any ad.
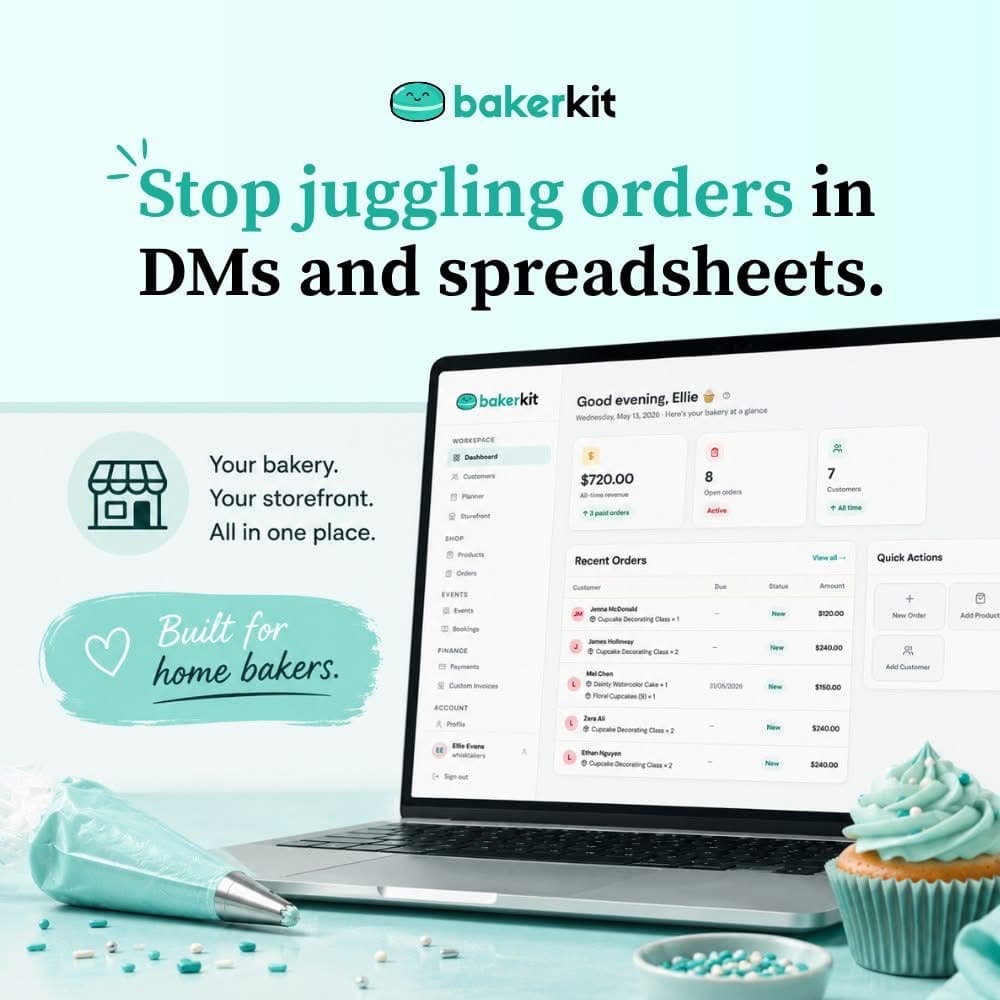
You're Live. What's Next?
Once orders start coming in, Bakerkit keeps everything organized in one place. You'll see new orders on your dashboard, get notified when customers check out, and be able to track payment status without chasing anyone down.
No more DMs. No more spreadsheets. Just orders, neatly organized and ready for you to bake.
Ready to get started? Your free 30-day trial is waiting, no credit card required.
Set up your storefront today →
Frequently Asked Questions
How long does it actually take to set up Bakerkit? Most bakers have their storefront live and ready to share within an hour. Adding products takes the most time, but even a small menu can be set up in under 30 minutes.
Do I need a Stripe account to use Bakerkit? No. You can use Bakerkit with manual payment methods only (cash, Venmo, Zelle, CashApp, PayPal, and more) at no cost. Stripe is only needed if you want to accept credit card payments online.
Can I customize my storefront URL? Yes. You choose your storefront URL during onboarding and can update it any time from your dashboard.
What if I want to change my products or prices later? You can update your products, prices, photos, and descriptions any time from your dashboard. Changes go live instantly.
Is Bakerkit free? Bakerkit offers a free 30-day trial with no credit card required. After your trial, a simple subscription keeps everything running.
Bakerkit - Bakery management software built for bakers, by people who get it.